

I first got the idea for a back-to-school Family Feast with a family theme from NieNie's blog. I loved the idea and I look forward to doing it year after year.
Crown How-To:
The crowns I made for my kids were inspired by the crowns found HERE. I made a few modifications for personal taste and to save money, but the basic idea is the same. I used the printable template that she so generously provided for free, found HERE.
My supply list:
6" cut of cotton fabric
Sheets of your basic craft felt (two dark brown, plus whatever colors you want for the inital and decorations)
Heavy weight fusible interfacing, about 6"x14"
Black sew-on velcro
Trimmings
Basic sewing supplies (thread, scissors, pins, etc.)
**First of all, in case you didn't know (I didn't until recently), you can have your fabric store cut you a piece of fabric by the inch. You don't have to buy cuts of fabric in relation to a yard (1/2 yard, 1/3 yard, 1/4 yard, 1/8 yard).**
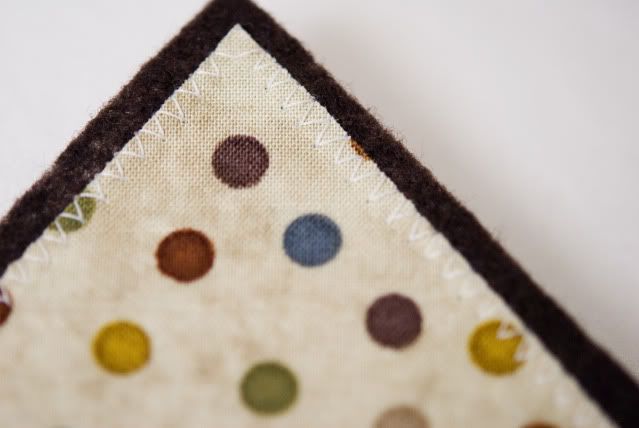
Basically, I followed the directions found HERE. But, instead of using two layers of felt, I used one layer cotton fabric and one layer of felt. I fused the heavy interfacing to the wrong side of the cotton fabric. In her tutorial, she used 100% wool felt. I didn't. My craft store doesn't carry the "real" stuff, and craft felt is much more economical. Real felt is much nicer, but for my purposes, I didn't think it mattered. One thing you should know is that a sheet of craft felt isn't long enough to line the whole crown. Instead, I cut out two half crown pieces from one sheet of felt, and then pieced them together. Really, you can't tell :) Sorry about the somewhat blurry pictures, I wasn't working in great light, and I'm trying not to be such a perfectionist about such things :)
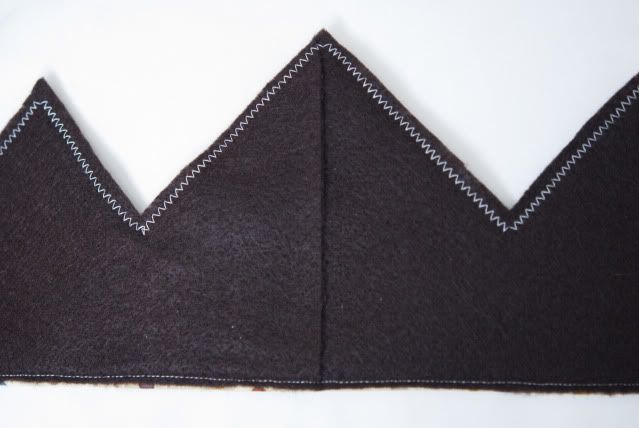

Since I was using cotton fabric, and not felt, I zig-ziagged the points to the felt to keep it from fraying. Also, I folded under the bottom edge of the crown about 1/4" before top-stitching it to the crown.
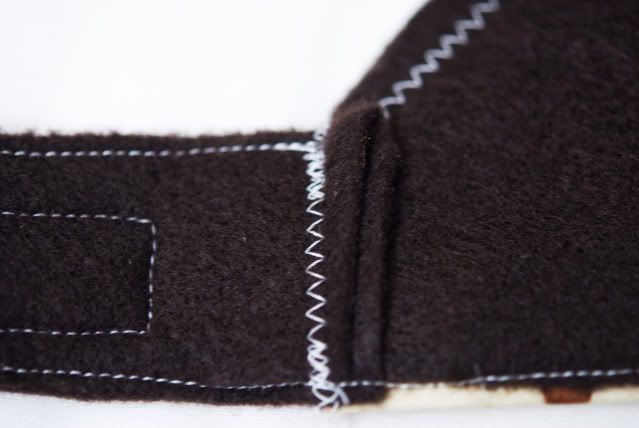
Instead of using elastic on the back, I used a double-layer of felt for straps on each side, and sewed on velcro for a more adjustable fit.

This is a project that you can really customize to your heart's content. And, it doesn't break the bank. I spent about $15 for all four crowns. $3 of that was spent on the fancy trim for Natalie's crown, and if you used the same cotton fabric for all your crowns, you could save even more money. You could easily get two crowns out of one cut of cotton fabric.
Non-Velveeta Nacho Cheese Sauce:
Although I think Velveeta cheese tastes really good, it's not at all good for you, and it's a little pricey. I found a recipe for a nacho cheese sauce HERE that uses real cheese, and I think that it's pretty good. I used about 1/2 cup less milk than the recipe calls for, I increased the amount of red bell peppers to 1/2 cup, and I didn't add any hot sauce. You can make it however you like :) The texture, though smooth, isn't quite as smooth as Velveeta sauce, but it's not really noticeable unless you're eating the cheese sauce all by itself...
Enjoy!!
2 comments:
i am so excited about this blog! and to make these cute crowns and have a family feast for Elena's birthday.
made my crowns today! thanks a million!
Post a Comment